

Before the internet will work, a certificate will need to be installed on each device and trusted.
How to's
-
tap_and_playInternet
Microsoft Windows 10
1. Download the certificate HERE.
2. Choose Open option when prompted to open or save the certificate.
3. When the certificate window opens, choose Install Certificate
4. The Certificate Import wizard appears. In the wizard, choose Next.
5. Then, when you are prompted for the Certificate Store, choose Place all certificates in the following store. Select the Trusted Root Certification Authorities store.
6. Complete the remaining steps of the wizard and click Finish.Apple MacOS
1. Download the certificate HERE.
2. Navigate to Finder > Applications > Utilities > Keychain Access app
3. Select "System" in the left-hand column.
4. Open ‘File > Import Items’ and import the certificate file into the "System" keychain. (The certificate should now show with a red X). That means it is entrusted.
5. To provide trust, double-click the certificate.
6. Under "Trust", change the setting at the top (When using this certificate) to "Always Trust".
Apple iOS
1. Download the certificate HERE
2. Open the certificate and you will get an option to Install.
3. Click the Install button and you will get a warning message.
4. Proceed further and click install.
5. Provide the iOS password(if any) then tap "Done"
6. Open Settings app
7. General > About > Certificate Trust Settings, and there is a section called "ENABLE FULL TRUST FOR ROOT CERTIFICATES". .
8. Enable the certificate.Android
1. Download the certificate HERE
2. Tap on the certificate to start install (enter your Pin Code or Pattern.)
3. Enter "SA EDU" for the certificate name. Tap OK
4. Open the Settings App
5. Go to Security > Trusted Credentials, and tap the User tab
6. If the certificate is present in the list of User certificates, then the certificate installed correctly.ChromeBook
1. Download the certificate HERE
2. On the chrome://settings page scroll down to ‘Advanced’.
3. Under "Privacy and Security," click "Manage Certificates.
4. Under the "Your Certificates" tab, click "Imports" to start the certification installation process
5. Once the certificate is installed it will be displayed under the "Authorities" tab.Contact
if you are having issues installing the web certificate please contact ICT Support
-
emailLearnlink
Setting up learnlink email on Apple mobile devices
Setting up learnlink email on Android
Sharing my learnlink calendar in outlook web app
Installing the learnlinks security certificate on ios devices
Installing the learnlink security certificate on android
-
markunread_mailboxLearnlink Clutter
How to disable Clutter
Login to Learnlink
(http://www.learnlink.sa.edu.au)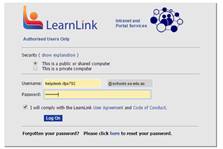
Click ‘Email’ (on the top menu as show below)

Click on the cog icon (top right of your email).

From the drop down menu select ‘Mail’ (at the bottom)
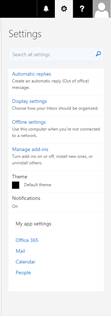
Select ‘Clutter’ from the left menu
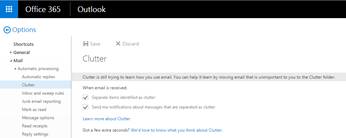
Untick both options and press ‘Save’
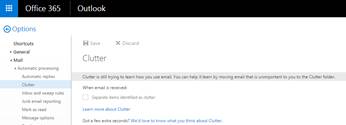
Emails will now not go into the ‘Clutter’ folder.
Any emails that were in your clutter before turning this off will remain in clutter. You will need to sort through these to see if anything important has ended up in there.
-
checkEducation Dashboard
Education Dashboard
To access the EDUPortal you will need your DECD payroll ID (username) and password. These are the same login details you use for your LearnLink account.
If you are unsure of your password, you will need to speak to your onsite LearnLink Administrator or contact the ICT Service Desk for support.
Once you have access to the portal you will need to request access to the relevant application.
Click on 'Menu' then 'My Account' then 'Request Access'.
You will find a list of available DECD applications, access request forms and contact information for the system administrator.
If you have access to a DECD application you no longer require, it is recommended that you arrange for your access to be removed via the Request Access section.
-
mail_outlineDistribution Lists
Email Distribution Lists
Automatically Updated Distribution Lists (via DECD/LearnLink Admin) dl.xxxx.staff@schools.sa.edu.au All Staff (Teachers, SSOs, IELC, etc.) dl.xxxx.teachers@schools.sa.edu.au All Teachers dl.xxxx.supportstaff@schools.sa.edu.au All SSOs
Manually Updated Distribution Lists dl.xxxx.info@schools.sa.edu.au General School Email dl.xxxx.admin@schools.sa.edu.au General School Email dl.xxxx.finance@schools.sa.edu.au Finance / Business Manager dl.xxxx.leaders@schools.sa.edu.au Site Leaders -
local_printshopPapercutPlease read below for some guidelines as how to operate the new software on a PC or on a Photocopier directly.
We are running a program called Papercut. This program monitors and can limit the amount of printing and photocopying that is done per user/account by setting a balance per user.
Staff at this stage will be allocated $50 per term, and students $5.
The cost of printing and photocopying is set at: 5c for Black & White and 10c for Colour.
The new Printer Names are:
SR-MONO– Staff Room Black & White
RC-MONO – Resource Center Black & White
RC-COLOUR – Resource Center Colour
ADMIN-COPIER – Admin Photocopier (Colour by Default)
CS-COPIER – Computer Suite Photocopier (Colour by Default)Each photocopier has also been setup to scan to a folder in staff share for all staff. Below are the locations of each copiers saved scans.
Scanner location for Computer Suite is
T:/!Scan/ComputerSuite
Scanner location for Admin is
T:/!Scan/Admin
Please read below for some guidelines as how to operate the software on a PC or on a Photocopier directly.
NOTE: Please see your technican for your pin/tag.
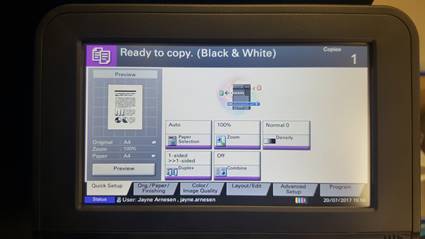
PRINTING FROM A PHOTOCOPIER
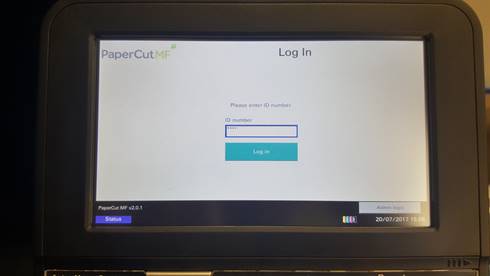
1) You will be presented with the Log In screen for the photocopiers as below
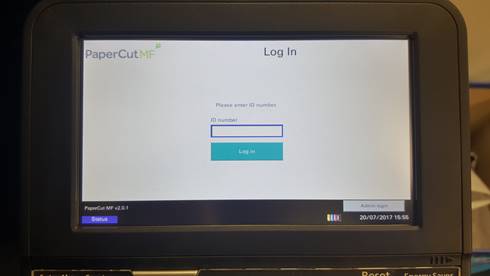
2) Using the Keypad enter your current supplied Pin Number & press the “Log In” on the screen
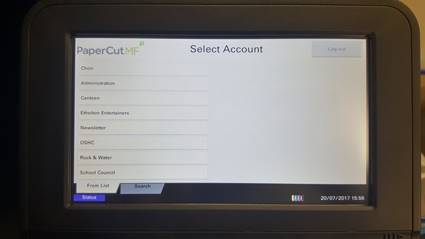
3) You will be prompted with a list of accounts that are assigned to your user account. Select the appropriate account you wish to charge to
4) You will be prompted with a confirmation screen, and select “next” if correct
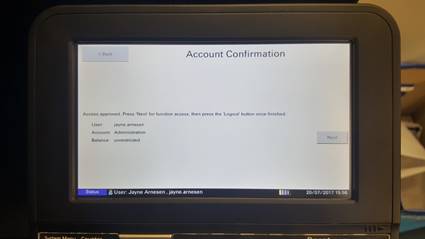
5) The photocopier is now ready for use to Copy or scan
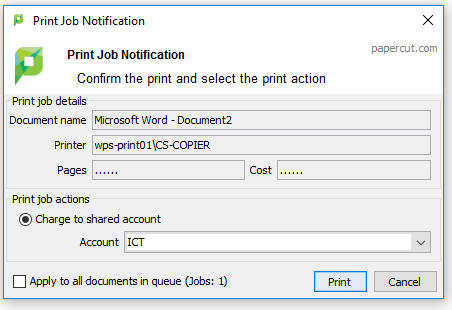
STAFF PRINTING
Once you are prepared to print, selected a printer required and pressed print you will see a “Print Job Notification” pop-up. This shows you the details of what you are about to print, the printer and the cost. It will also give you a “Charge to share account” selection. You are required to select an account from the drop down box and confirm your choice by re-selecting print as shown below
STUDENT PRINTING
Students have an allocated personal balance of $5 per term, no additional inputs are required for printing.
-
headset_micHelpdesk
To log a helpdesk job you will find a link on the new Intranet called “Helpdesk”
If you click on this you will hopefully see an email address
To add a request all you need to do is email this address
PLEASE GIVE AS MUCH INFORMATION AS POSSIBLE
ie The room you are in, which computer you experienced the issue etc
After you have added a request you will receive an email to let you know that we have received your request. Once we have fixed the issue an email will be sent back with a copy of the resolution.
-
computerDECD ICT Policies
-
gestureLoop Documentation
Browser Support
Loop has been tested in Chrome / Firefox / Safari and IE 10/11.
It has been tested on Admin Machines, but you may need to adjust the compatability mode for the intranet.
To do this on an Admin Machine:
Press Alt to display the IE menu.
Choose Tools
Compatibility View settings
Remove the checkmark next to Display intranet sites in Compatibility View.
Choose Close.
Metatags
There is a refresh content tag on the index page. This is so the data displayed for the Weather and UV-Index is up-to-date. This will run every 15 mins the page is open.
-
ondemand_videoSignage
Changing a slide
Slides need to be saved in the Intranet / images / signage folder as jpegs
They will need to be saved with the same naming format eg slide_1.jpeg
They are 1080 * 1920 pixels big
The original psd files are inside the jpeg folder for reference
Adding / Removing a slide
Slides need to be created and saved as above
Once the slide is inside the folder, you will need to edit a script to allow the machine to pickup the changes to the amount of slides.
Go to Intranet / js / directorySlider_signage.js and edit with either Dreamweaver or Notepad ++
You are looking for the line that has: "numslides: xx,"
Replace the value of xx with the amount of slides now in the folder
Save and close out
Restart the Signage Computer to instantly display the new content
-
local_phonePhone List
To phone other extensions: dial extension only
To transfer a call; press OK then dial extension number
For outside line; dial 0 or press line
Location Extension Front Office 01 11 Front Office 02 12 Principal 14 AP 15 Finance 13 Co-ordinator 16 Staffroom 27 Library 32 Canteen 28 Building 2 29 Building 4 30 Building 6 31 Pre-School 33 GP 34 Aboriginal Education 35